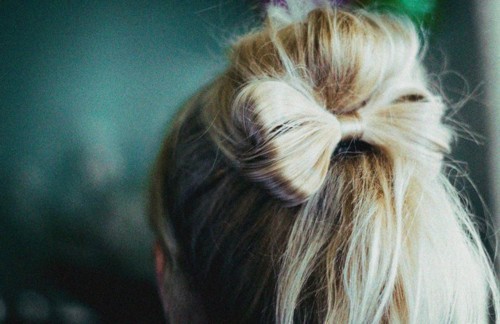
Tuesday, February 14, 2012

love you for a thousand years


" So today I was in Hallmark buying my mom a Happy Birthday card when I noticed this old man standing in front of the Valentines card section deciding which one to get.  I decide to go over and I asked him "Are you getting a Valentine's Day card for your wife?" in replies 'No my wife died 3 years ago from breast cancer but I still buy her roses and a card and bring them to her grave to prove to her that she was the only one that will ever have my heart' 

(not my story, but I thought it was just so sweet, share any of yours down in the comment, or shout out your lovers name to show them how much you love them, happy valentines)


Saturday, February 4, 2012

NERD ALERT: Dry Shampoo Alternative


I always though that buying a bottle of dry shampoo was a huge splurge on money, since it costed so much!  But luckily, I was still living to this day!  I found this cool method on a magazine, and it required only two things, that probably most people already have at home.  And it states to strip out all the excess moister you have in your roots from not washing your hair.  The two things you need are:

1.  Baking Soda
2.  Paddle Brush

And that is it, just apply a good amount baking soda around your roots, and brush through your hair, until the baking soda completely vanishes, of course you can also use Baby Powder, if you guys haven't already figured.  But thank god baking soda doesn't leave you smelling like a baby!

Thursday, January 26, 2012

How To: Messy Bun Hair


This look is so cute and easy and looks nearly effortless and beautiful.  And takes only 5 minutes!  Perfect for on the go, school, traveling, night-time, whatever.  It encompasses pretty much everything that I have really love in a hairstyle.  So lets get started.
1.  Make sure you hair is semi-straight, like the day before you straightened it, or straighten it now, which of course might take longer than 5 minutes, but the hairstyle looks best if you have straight hair.
2. Flip you hair down, and gather all you hair, making sure you have an elastic, and wrap it around once, than take your hair pony, and wrap it around that elastic.
3.  Secure it by finishing wrapping your elastic around your hair.
4. Choose you location (top or back) or your head, and play around with it.  For this look loosen it up.  Gather some bangs from the border of your face if you want.  And straighten it or leave it as desired.
5. Tug on some pieces to give the effortless look, and volume; and your hair is complete.  Finish off with some hair spray, and your ready to hit the roads.

Tuesday, January 24, 2012

Take A Bow


This is just going to be a really quick post, on cute ways to incorporate bows, into your outfits, hairstyles, life, whatever, hope you guys enjoy the pictures.

Hair


Outfits


Swimming Suit


Shoes


Monday, January 23, 2012

Teal Oh So How Pretty!


Lately I have been overly obsessed with this teal color, and to see the color on someone outfit is just the cherry on the top.  Now don't you guys think its both stylish and cute.  I love the color of skinny pants, expecially the best color ever invented.  God, I am obsessed with this color, it's so pretty!


Sunday, January 22, 2012

How To Get Perfectly Straight Hair

Haven't you guys ever admired, those girls who had pitch straight, beautiful, glowing hair, while yours looked like a total disaster by the end of the day.  I do!  First of all, I never understood why, it's not like I'm running a triathlon everyday of my life, but my hair ends up turning out wavy, and just flicking out on the ends, gross.  So, I found a way to keep you hair pitch straight all day long.


1. Washing Your Hair
Now, this you need to keep in consistent, but it really depends, if your hair doesn't get oily until 2-3 days, then keep it between washes, but like you probably already know that, washing you hair is unhealthy, so I was it every other day.  Also if your, the kind of people who wash their hair before styling chances, are you have to wait a little longer for you hair to completely dry, but that fine, I just find it best, if you washed your hair the day before you style it, so you get a little bit oil so you hair doesn't look so fatigue.

2. Blow Drying It
I started to do this instead of air drying it, but whatever works best for you.  Air drying is obviously less damaging so that is probably the more reasonable choice to go with.  Also, keep in mind, that you should brush it with a wide tooth comb to get all the tangles out, this will also make you have to straighten less part of you hair.  The more less heat, less damage!

3. Start Your Straightener
So it depends if your the person who blast up the heat or keep it mild, I would go with the normal heat setting you straightener set up, but it all depends on you.

4. Section It Off
Honestly, everybody gets sick of having to take the long route, but do it on how much time you have, section it off in 3 or just in half, but this is the best method.  I section my hair out in half, from both of my ears, then I straighten my bottom layer, and then let go the first and then straighten.  Oh yes, don't forget to stray HEAT PROTECTANT!  To all you hair before you straighten and comb it through, it will help it dry quicker, and spread it through your hair/

5. Bangs
This is probably the most important part, I personally don't have bangs, because I grew them all out, but doesn't mean you neglect them!  So I just pull them all in the front and straight them that way, it adds a little touch.  And I also, after everything is done, straighten my hair backwards, by that I mean, flip my hair down, and straighten some to add more volume.

6. Product
Now, you can either attach it with hair spray of mouse, for that will help it stay.  Some good products you find that can help you keep in the straight, buy them!  I personally love this thing called S-Factor, it's a little pricey, but you only need a small amount and it works like heaven!

Saturday, January 21, 2012

How to put on Mascara


1. Curl Them: Normally, it usually depends if your naturally born with curled eyelashes, or if you have to curl them.  But to make the mascara look nice, you need to curl them, for those of you who don't have them, do it.  To do so, place the eyelash curler as close to the eyes as possible, without poking your eye out.  Then clip it down for about 10 seconds, release the clamp and then close it again, another 10 seconds, and you should be ready.  Repeat on the other eye.
2. Shadow it: With all the different options to wear on eye, you should always shadow them a little.  The best method I use is to use a shimmer of grey, or bronze.  Place it on the top crease, and the bottom, for just a little layer.
3. Mascara: However weird this may sound, but those who are not steady in hand, can take a business card, cut on of the sides, to a curve to fit you eye.  Then place the card above your eyes, and apply you favorite mascara.  If you don't need that extra nudge, then skip that step, but everybody needs to know this.  Start with you mascara wand as close to the eyes as possible, then wiggle it slightly back and for to help separate them.  Do that twice, then wand it out, by just framing you eyelashes how you want them.
4. Bold Brows: If you are new to brow shaping and grooming. I recommend going with your natural shape this can be found by holding one of your makeup brushes vertically against you nose, it should line up with the beginning of your eyebrow. From the outermost corner of your nostril, hold the brush at an angle to is intersects your pupil if you were to be looking straight forward, and that should be where your arch is. Going again from the corner of your nostril, line up the brush with the outer corner of your eye, and that is where your brow should end.
Related Posts Plugin for WordPress, Blogger...